now i am sure everyone has seen vids out there of how to install the TR rear shock tower well i am here to clarify how to do it because teh vid is poorly done IMHO (no offense to TR but the vid needs redone). please read below for installation and i will post pics later.
first, off my package contained 2 long hex screws (countersink type), 2 short hex cap head screws, and 2 short hex buton head screws, 2 lock nuts, the V2 rear shock tower, and a tr sticker. yet when trying to follow the video the gentleman in it goes off on some tangient about some adding locknuts to one of the screws that holds the rear shcok mount on and stating you will need to change the short screws to long. i will clarify in the below installation instructions which ARE correct for the V2 rear tower.
first off you will need the following tools for the job. you will need a 2.5mm hex (allen) wrench or driver, a 7mm nut driver (or equivelent), and the silver hex/allen included with you baja

ok begin by opening up your rear shock mount package and remove all of the pieces and lay them out, here is a pic of the included items with my V2 rear shock mount (all except the turtle racing sticker).

now remove your rear wing from your buggy (this makes removal of old shock mount and installation of tr easier).
with the rear wing removed remove the bolts that attach the shocks to the shock mount, then remove teh bolts that hold the shock mount to the shock towers. here is a pic of it disassembled ready for to accept the new tr rear shock mount.

after this is done make sure to place all of the STOCK parts off to the side so you do not mix them up with the new stuff (referring to the hardware).
ok now to install the V2 rear shock mount take the 2 longcountersunk type hex screws and install them in the lower hole of the shock mount and then screw them into the bottom shock tower hole (the one that goes through teh shock tower support).
now this is where you will start noticing the video from tr going bonky LOL. the vid starts talkign about some using nuts and you need to replace the screw with a longer one well that is not the case with the rear shock mount i received from DDM because the screws i had left after installing the longer ones were both the same length only difference being one was a button head and one was cap head and BOTH would easily go completely through the upper shock tower to which you would only need another set of nuts.
ok with that said, take the BUTTON HEAD screws and install them through the upper shock mount hole through the shock tower
here is what i deemed as correct screw placement.

lastly use the remaining cap head screws and the nuts to install the shocks to the tr shock mount, pic also shows location of button head and countersunk screw locations.
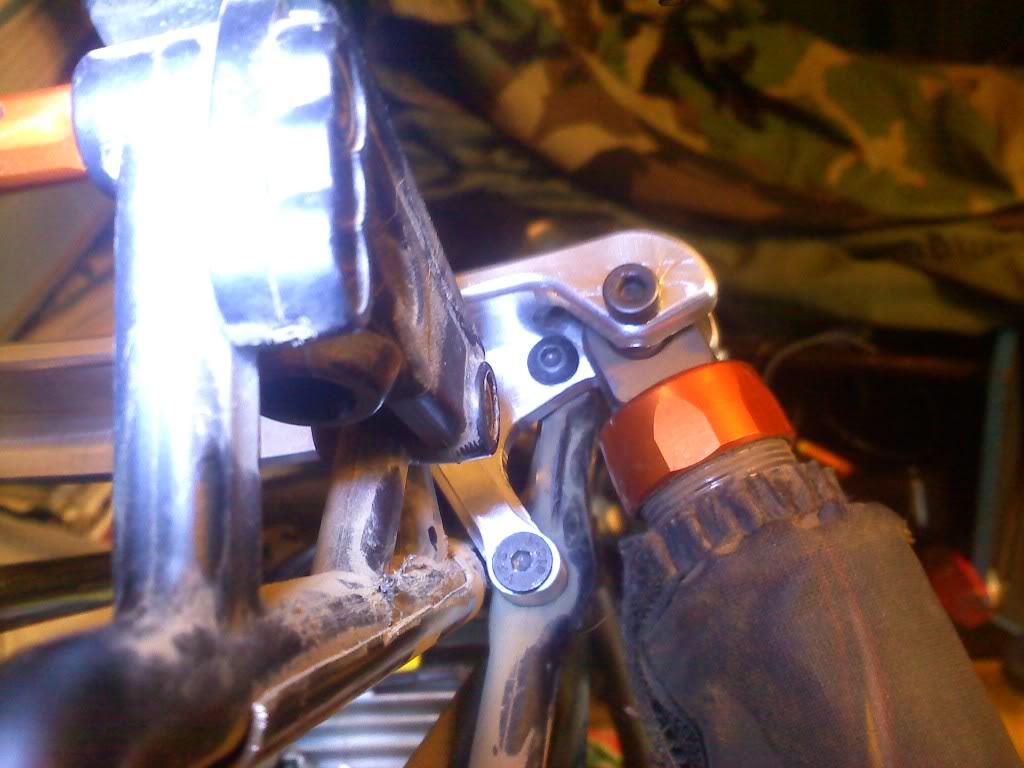
here is a pic of the nuts location, also note the plastic on the rear shock tower showing how by removing the plastic that was "pushed out" installing the upper shock munt screw you could easily fit some type of nut on the bolt although IMHO this is unneccesary and although it might help for extreme jumping i do not really think this is something to concern yourself with.

it is very easy to do and although the vid from tr is ok i think it needs redone as it was not 100% accurate with the V2 rear shock mount i received from DDM
now let me clarify the reason i say use the button head screws for the upper rear schock mount hole instead of the cap head (which is the same length). the button head screw has little to no chance of hitting or interfearig with the shock where as the larger cap head screw may, also the shorter length cap head screw uses a larger size hex wrench compared to the button head screw. hope this helps those of you whom are having difficulties following the TR vid or those that prefer the kinks already worked out by a user whom has installed one already LOL.